If you’ve been in the software development world over past few years, you can’t avoid noticing that React js popularity continues its rising insanely.
Came out in 2013, it’s currently the hottest and the fastest of the bunch because of its implementation of a virtual DOM and synthetic event. Another thing developers love about React js is that it’s much easier for developers with JavaScript experience to get a handle on.
It’s totally not magnify to say that learning React.js is almost a must. Nonetheless, with hundreds of free React js resources out there, you might pull your hair out to make decision which one you should get your feet wet with.
Lucky for you, I have pulled together a huge list of resources that will either help you get started with React js or broaden your understanding if you already know the basics:
Egghead
Egghead is an awesome resource where you can get all information on many different JavaScript libraries. And React js is one of them for sure.
Personally, I highly recommend you to try the React Fundamentals course which is totally free. It’s absolutely a great place for beginners to get their feet wet with and to quickly gain knowledge about all features of React js
React JS Crash Course (YouTube)
Covering all the basics including MVC architecture and the very foundational structure of React js applications, this React Crash Course video is your best bet.
Even though it’s not a complete guide, but I think it’s a solid introduction to the library that can help you shorten the time you will take to learn this awesome technology.
React js for Beginners (YouTube)
Another YouTube video that I want to share with you is React js for Beginners by Dev Tigris.
Its name said it all. This vid is a complete guide for beginners. The teaching style is very clear and easy to follow
FB React Docs
Did I mention React.js is the super hero standing behind and powering Facebook user interface? Yes, it is. Awesome, right?
Therefore, if you are looking for free React resources, you can’t not avoid mentioning the Facebook documentation.
It takes time and effort to work through these doc since there’s a lot of knowledge you need to absorb. But at the end of the day you will realize that it’s definitely worthy to try.
On the other hand, from all resources I saw, this tutorial is still one of my best resources to learn the basics of React js. If you are a beginner in React js and want a solid start in a short time, then it’s a good fit for you.
To-do App With React
It’s one of dozens of React js tutorials on Scotch.io. In my opinion, this simple to-do appis totally stand out from the crowd.
To-do app with React will guide you through a typical workflow and teaches common practices for building web apps
React Enlightenment
The React Enlightenment guide is another better sites for you to keep an eye on throughout your journey. One of its benefits is that it’s an open source. So, everything is free. You can easily read online or download if you like
This website is clean and extremely easy to navigate, using symbols, lists and a simple grid to lead to you the desired information. Moreover, this guide is frequently updated with new information.
TutsPlus React Tutorials
I have to admit that every tutorial on the TutsPlus site is very extraordinary.
Covering endless articles from basic to more advanced functions for any skill levels, The Tusplus React category will help you really get to grips with the knowledge of React js. If you’re new to the React world, I recommend you to give Getting Started With React a try. I promise it won’t let your down.
Final Thoughts
There’s a ton of free beginner React js tutorials out there for you to choose and they will help you gain a solid understanding of React. This is my favorite list.
Hopefully, you are able to find at least one from these above resources to guide you through the world of JavaScript. It would be a good start for you to begin your new journey. But remember, nothing can replace what you learn by actually getting your hands dirty with it. Start on a new JavaScript project now!
If you know of any other great beginner JavaScript resources I missed, tell me about them in the comments. I’d love to hear your own reviews.
jQuery is a quite small yet fast JavaScript library that consists of a number of extensible and durable features, and commonly used as a single method that performs a series of operations on one selection.
For example, its easy-to-use API is consistent with all browsers and can easily enable HTML animation, DOM manipulation, and event handling. Thus, bringing a more effortless client-side scripting for software programmers. In this article, let’s see how to write a plugin with jQuery.
How jQuery works: jQuery Object Methods
Before starting to write your own plugins, you must pretty understand how jQuery works first. Take a look at this code:
This is a basic jQuery code, but do you know what’s happening behind the scenes? When you use the $ function to select elements, it gives back a jQuery object which contains all of the methods you’ve been using (.css(), .click(), etc.) and every element that fits your selector. These methods come from the $.fn object.
Chaining
To help your plugin survive in the real world, there are a couple of things you need to do for it. When you link 4 or 5 actions onto one selector, you’re coming to the chaining feature of jQuery. This feature is done by having all jQuery object methods return the original jQuery object again (exceptions: .width() only returns the width of the selected element, not chainable). Making your plugin method chainable just takes one line of code:
Protecting the $ Alias and Adding Scope
Since the $ variable is very popular among JavaScript libraries, a conflict in the use of $ may arise when more than one jQuery library is required. The solution to this problem is you must place the code inside the expression of the immediately invoked function. This is carried out by the passing of jQuery and then naming its parameter $.
Adding Private Methods and Variables
After the alias ($) matter is resolved, move on to the next step: adding private methods or variables. In JavaScript (this case is jQuery), functions contain several variables and other functions that can be mainly accessed from inside the function, thus making the elements private. For the best way to access private variables and methods, you must use Immediately invoked function expressions.
Remember adding a private variable and enabling its use is only possible by using the Immediately Invoked Function:
These private methods can solely be called from within the scope of the function and only other private methods or public methods have the authority to call them. This is also for accessing the private variables.
Adding Public Methods
Public methods can be accomplished by nearly the same process as what you just did with private methods. There’s just one difference between these 2, the execution of the method. The method becomes public when it is supplied with a ‘this’ operator. The purpose of adding such public methods could be either to perform a function or to access the public variables and methods from outside the scope of the function.
Accepting Options for Plugin Customization
In some cases, your plugins turn more complex as you continue to add to them. Hence, it is a smart idea to make your plugin be capable of accepting some options and make them customizable. The easiest way to do this, especially when there are a lot of options, is with an object literal.
Putting it All Together
Combining all techniques we’ve discussed, the result is the following small plugin as below:
As you can see, the syntax ‘each()’ is used to loop through a collection of elements. Also, the return value for this method is the ‘this.append()’ which accepts the callback. We will be able to see what element is being appended to in the collection whereupon it returns.
Hope our simple guidance for coding with JavaScript and this one – jQuery could help you be quite well-prepared and get ready to start the work by yourself. Now, let’s go code your own plugin, and don’t hesitate to share any of your confusion with Designveloper right down here in the comment box.
As I mentioned earlier, it’s the age of mobile devices nowadays. In fact, there are 6.8 billion people on the planet, 4 billion of them use a mobile phone and only 3.5 billion of them use a toothbrush.
How ridiculous it is! That’s why if your website doesn’t read well on those devices, it is possible to lose out on a huge chunk of potential customers. This is where responsive design can come into the picture and save your day nicely.
Good news is that creating a responsive website from scratch isn’t as daunting as it once was. Follow these crucial tips for a responsive site that actually works well and provides the flexibility it’s supposed to.
Keep things simple
One of the first and foremost principles to keep in mind when creating a responsive website: simplicity is the key to brilliance. Sometimes, web designers want to show off their excellence designing skills when creating a website. That’s not bad at all but when it comes to a responsive website, everything should be made as simple as possible. Also, 2016 is about minimalism and simplicity.
Remember that you are delivering the content to very limited space, there’s no room out there for you to clutter up.
Remove the unnecessary content
In order to make your responsive site really shine, simply bear one thing in mind: get rid of non-essential content. It’s not only for your user experience but also the website’s speed.
You know some content or elements of a desktop website are never meant to be used in its mobile version. Our goal is not to precisely reproduce the desktop website, but to offer the same experience to all visitors even coming in through their smartphone or their tablet.
Take the sidebar as an example, it’s a fundamental element of desktop web design, but it can clutter up the limited space of mobile screens.
Always prioritize mobile devices
Because mobile is becoming more relevant than desktop, you should always focus on the way visitors interact with your website by using their mobile phones first. Then build out your design for larger screen size. This will ensure the best possible user experience across all platforms.
Make your images flexible
Everyone already knew that one of the drawbacks of responsive design is a slow loading time. But not all of them know the main reason behind a slow site is non-optimized images. So don’t let those images drag your responsiveness down.
You can make your images flexible in a variety of ways, but one of the easiest methods is using this little handy tool: Adaptive Image
One more thing, be sure to use GIF, JPEG or PNG-8 formats to limit file sizes and help speed up the website.
Make friend with Media Queries
For those who haven’t been acquainted with media queries yet, they are a feature of CSS3 that allow content to respond to different condition on a particular device. Media queries check for a device’s resolution, height, width, and orientation. Media queries come in really handy when creating a responsive website. They are extremely simple to use as well.
Make your website readable
Nothing is more frustrating than zoom in and out, up and down, right and left to read the content. So, make sure your website legible. Visitors always want convenience, not a challenge. Your text should be large enough and comfortable to read from a smaller screen. I highly recommend a text size of 16px, 1 em or 12 pt.
Final thought
These mentioned above are just some of the more important ones you can try out. And hopefully, by now you already had some ideas of how you can use these tips for your stunning responsive website.
jQuery is a quite small yet fast JavaScript library that consists of a number of extensible and durable features, and commonly used as a single method that performs a series of operations on one selection. For example, its easy-to-use API is consistent with all browsers and can easily enable HTML animation, DOM manipulation, and event handling. Thus, bringing a more effortless client-side scripting for software programmers. In this article, let’s see how to write a plugin with jQuery.
How jQuery works: jQuery Object Methods
Before starting to write your own plugins, you must pretty understand how jQuery works first. Take a look at this code:
This is a basic jQuery code, but do you know what’s happening behind the scenes? When you use the $ function to select elements, it gives back a jQuery object which contains all of the methods you’ve been using (.css(), .click(), etc.) and every element that fits your selector. These methods come from the $.fn object.
Chaining
To help your plugin survive in the real world, there are a couple of things you need to do for it. When you link 4 or 5 actions onto one selector, you’re coming to the chaining feature of jQuery. This feature is done by having all jQuery object methods return the original jQuery object again (exceptions: .width() only returns the width of the selected element, not chainable). Making your plugin method chainable just takes one line of code:
Protecting the $ Alias and Adding Scope
Since the $ variable is very popular among JavaScript libraries, a conflict in the use of $ may arise when more than one jQuery library is required. The solution to this problem is you must place the code inside the expression of the immediately invoked function. This is carried out by the passing of jQuery and then naming its parameter $.
Adding Private Methods and Variables
After the alias ($) matter is resolved, move on to the next step: adding private methods or variables. In JavaScript (this case is jQuery), functions contain several variables and other functions that can be mainly accessed from inside the function, thus making the elements private. For the best way to access private variables and methods, you must use Immediately invoked function expressions.
Remember adding a private variable and enabling its use is only possible by using the Immediately Invoked Function:
These private methods can solely be called from within the scope of the function and only other private methods or public methods have the authority to call them. This is also for accessing the private variables.
Adding Public Methods
Public methods can be accomplished by nearly the same process as what you just did with private methods. There’s just one difference between these 2, the execution of the method. The method becomes public when it is supplied with a ‘this’ operator. The purpose of adding such public methods could be either to perform a function or to access the public variables and methods from outside the scope of the function.
Accepting Options for Plugin Customization
In some cases, your plugins turn more complex as you continue to add to them. Hence, it is a smart idea to make your plugin be capable of accepting some options and make them customizable. The easiest way to do this, especially when there are a lot of options, is with an object literal.
Putting it All Together
Combining all techniques we’ve discussed, the result is the following small plugin as below:
As you can see, the syntax ‘each()’ is used to loop through a collection of elements. Also, the return value for this method is the ‘this.append()’ which accepts the callback. We will be able to see what element is being appended to in the collection whereupon it returns.
Hope our simple guidance for coding with JavaScript and this one – jQuery could help you be quite well-prepared and get ready to start the work by yourself. Now, let’s go code your own plugin, and don’t hesitate to share any of your confusion with Designveloper right down here in the comment box.
Ranging from Facebook’s iconic sky blue F to the golden M of McDonald’s, logos that perfectly represent brand personality can instantaneously lock the audience’s memory in. How did well-recognized brands come up with such timeless icons? Who was behind them? What factors in the perfect logo? Where to find a great team of designers? Or how to create a logo on a budget? Designveloper offers you two cents on this question.
Simplicity
(Nike – Apple – McDonalds – Audi – Playboy)
If you are an independent business owner who is profiting from emerging e-commerce, you might want to opt for something simple. Try thinking about your first date. How you come up with a sketch of your business logo is the same way you dress to impress on your first date. Believe you and me, you would not want to be seen as putting on display, would you? Know your target audience, and dress properly. Something in your closet that you come across on a daily basis, something that screams out your personality, something that energizes you on the dullest day… Designing a brand logo is the same way you put together an outfit for a date night, or a date lunch if you are into daylight rendezvouses.
It takes 50 milliseconds for the digital audience to form an opinion about your logo which determines whether they decide to like it or not. Same as the dating game. It takes less than five seconds for someone to categorize you into a fraction. Reserved, geeky, liberal hippie, pure businessman, … the first impression truly counts. Simplicity speaks class, therefore, timeless. Standing by scads of existing logos, you need to stay true to your color- your business color aka your business service to your dear clients while standing out of the crowd.
A logo could be a letter, a text, an image, a lingo or a symbol. There is much power implied in a simple logo. It says “Cut to the chase and get down to business” with your client, which is what most of your clients would want to profess while searching for the right designers. The simplicity of your logo needs to be demonstrated on different digital platforms. If your clients’ kid can doodle your logo, you are up by half the game.
Catchy
Visa – Shell – Disney – CocaCola – IBM
The element of catchiness not only lies in the brand advertising tunes as you might think but also lies in the spectrum of colors that are used in the creation of your logo. This means your logo cannot be hard to identify and perceive at first sight. It must be easy to recognize from afar. Imagine the internet users are fast-scrolling copious designs and your logo is one of the top 10 that pop out and can be known by sight. You are halfway there till one of the potential customers can call your logo to mind while they search for a service provider. Your logo simply has to catch attention, otherwise it would easily blend in the other thousands of designs.
Catchiness does not mean you have to the come-and-go clichés in designing. There is no certain formula in designing a logo. However, a single letter with a vibrant color might stand out, but it might lack personality. Remember your outfit on your first date? Choices of tops and footwear that are color-matching are impressive, but your outfit accessories might help you stand out of the crowd of ombre-looking outfits. A letter, or plural letters, with signature color and an unusual format or font can playfully stir the viewer’s mind.
As you know by now, that’s 50 milliseconds or 0.05 seconds you, as a logo designer, should not underestimate. The first impression in a great visual logo design makes or breaks – either resonates well with the audience or blends in the rest of millions of logo designs. Like a catchy tune that gets stuck in your head even when you resent it, you cannot help but humming to that tune while taking a shower, a catchy logo must stick to the mind longer than a second, especially with the fast reducing attention span of the internet users nowadays – 45 seconds.
Relatable
Tinder
Freedom – inspiration idea for an innovative company
If a logo enables a person to feel that they can relate to someone or something familiar and even themselves, you are halfway down the road of creating a kick-ass logo. The experience of emotions can be powerful as our memories are attached to it. A palm tree that speaks nature and chill time for a resort, a unique rough sketch of an elephant for a note-taking application that puzzles the users really hard – why an elephant”; an image of a furniture piece in grayscale resonates with the segment of customers that are scouting for vintage interiors… Anything that generates familiarity in the back of the customers’ mind will work since this type of memory would be triggered again anytime when the customers are in the environment that reminds them of the image – the concept of your logo.
The work of a logo designer lies outside of customizing a product as per the clients’ request. A designer must also be a magician who evokes emotions into customers’ mind, making them recall your service – your work – for as many times as possible.
Graphic
UPS – United Parcel Service, logistics company, NBC – National Broadcasting Company
A large audience of the internet are visual. Visual content like videos and gifs are on the upward trend in Southeast Asia since 2016. The ever-shrinking span of attention among internet users, from 4 minutes 45 seconds in 2012 to 45 seconds in 2018 puts up quite a challenge to content creators and designers. Something graphic, vivid and lively is more likely to rouse the audience’ emotions, which in turn creates a more lasting impression on your logo and induces engagement. Before opting for a graphic for your brand logo, make sure you have checked the appropriateness of the graphic toward to majority of the internet users.
Ask yourself who are you in your clients’ business venture – a consultant, a fellow, someone who brings changes, someone who is willing to shed some truth to your clients’ unrealistic ideas. If you are designing a logo for your own company, ask yourself these three questions – who are you to your clients, what values do you bring to the game and what can best represent your brand personality. The lush green of palm trees may suggest business in hospitality or a beauty and spa service but probably not a great logo idea for an engineering consultant company.
If you have trouble sorting through the right graphic options for your business logos, contact professional designers in Designveloper (insert a hyperlink here). We are more than willing to help you with thousands of available graphics options that best match with your brand personality.
Resizable
GE – General Electric, HP – Hewlett-Packard, Walmart
Your business logo will be shown and printed on various mediums – company website, T-shirts for outdoor teambuilding activities, your staff’s electronic signature, desk calendars, neon signs, advertisement billboards, promotional items like pens and pencils, etc… Whatever details and design twists you bring into your logo design, regardless of its complexity, make sure it can be seen on a miniature scale. Should you wish to have your logo appear on larger surfaces like billboards, make sure the proportion of the design is equivalent to the original one – this means the tail of the huge sky blue Facebook icon of the letter F cannot be too long or the stroke too wide.
The versatility of your logo design should be well-represented on promotional products. The Swoosh symbol of Nike can be seen in plenty of colors besides white – on socks, sneakers, trainer T-shirts, trainer shorts, caps, backpacks and even bootleg products such as wallets, scarves, and sunglasses. It’s best to consult with a professional marketer or a designer before you put forth a logo design on your products. With … years of experience in customizing logo design, Designveloper can turn the most abstract idea of yours into reality.
To start every project with an outsourcing company, the very first action businesses need to do is providing initial ideas, key requirements so that the development company could conduct an estimation for your future products. But do you really know what a project estimation includes, what steps should be done and how important this document is? Let’s dig into this topic with Designveloper to have a better insight into the estimation process.
Definition of project estimation
Project estimation is the activity of predicting core factors that are likely to affect the process such as:
– Process size
– The effort in person-month or person-hour
– The project duration and milestones
– Budget
– …
The person who is in charge of this work will use all the very first inputs or requirements from his/her client to product estimations for the future project.
The importance of estimation when developing a product
“A business needs estimations to plan and prepare its resources such as human, time and money.” Image: LinkedIn.
Do you know that one of the most common causes that make many projects failed is inaccurate estimations? A classic example you may already know is IBM – Queensland deal. In 2007, IBM pitched a crazy bid of $6 million to develop an application to administer payroll for Queensland’s health department. Shortly after that, the company faced a lot of hidden business obstacles and technical challenges. In the end, the application could not work properly and the cost for this project was 200 times higher than the estimation.
This case study has shown you how crucial an estimating activity is to software development companies and their clients.
In other words, a business needs estimations to plan and prepare its resources such as human, time and money. Thus, when planning estimations, we are able to find risks, opportunities and hidden obstacle which may happen during the process. The more detailed and insightful your estimations are the more chances that your budget and time plan fit the reality.
Furthermore, you may find it useful that estimations will help your team or you and partners reach agreements and commitment about requirements, proposed functions, etc. easier.
On the other hand, you and your team are able to check if your soon-to-be outsourcing partner has enough knowledge and experience in technology. The team that is good often comes up with more detailed and comprehensive estimations because they have done numerous projects to master this. Designveloper is one of those experienced companies like that, right now you can try to estimate your idea with Designveloper here.
There are various methods of estimation
But first, let me introduce you three steps that should be completed before hen starting the estimating process:
– Step 1:Establish estimation scopes and purposes. To run as an estimating process smoothly, not only must there be a baseline to measure all future possibilities but also every misunderstanding and contradictory should be cleared off. And how to achieve these? The answer is that all participants need to understand scopes and purposes of each estimation.
– Step 2:Establish technical baselines, ground rules, and assumptions. It is essential to identify the functionality of the estimation. Nevertheless, if the requirement is too vague to define, you have to use your team’s ground rules and estimators’ assumption to decide what elements are and are not included in the estimation. Furthermore, your team needs to establish assumptions frequently to match with the development of the process.
– Step 3: Collect data. Estimations always include a lot of uncertainty, that’s this activity happens to ensure a consistent estimation. Furthermore, these pieces of information will allow estimators to develop their own viable initial estimations.
After collecting and establish the base, let’s choose one of these approaches to carry out your estimation.
First, we will talk about some common methods:
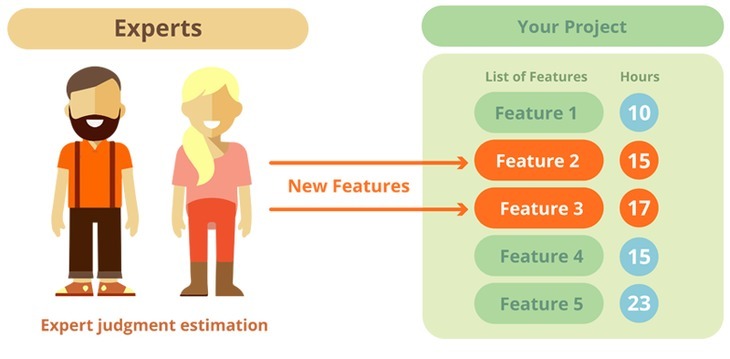
Expert judgment:
Expert judgment. Image: rubygarage.org.
– What is it? In a study conducted by ACAPS in 2017 has stated: “When experts give their opinions in a context of decision-making, these become expert judgments.” In other words, it is a process of one person or a group of people who have knowledge of the domain making predictions based on their experience or a particular set of criteria. Expert judgment performs its benefit across industries such as financing, marketing, and especially technical industry.
– Upsides: it only takes us just a short while to produce estimations. Moreover, this method requires little resources (time and money, etc.) and can be precise like any other expensive methods.
– Downsides: There are many benefits resulted by using Expert Judgment to estimate a project. However, lots of disadvantages come along with this one too. Sometimes, experts don’t have clear evidence-based reasons to support their opinions as well as estimations. Nevertheless, their judgments may be affected by bias (personal experience, time pressure, etc.). That’s why expert judgment is also a risky method to use.
– A variant of expert judgment is Analogous Estimation. This technique uses historical data from a similar job in the past to estimate analogous parameters for the future project. Some of the parameters used in this method are scope, cost, and duration.
COCOMO (Formal estimation model)
– What is it? Constructive Cost Model or CoCoMo is a software estimation model developed by Barry W. Boehm. This is a procedural model used to predict size, cost, effort, time and quality of a project. There are three types of CoCoMo model: Basic CoCoMo Model, Intermediate CoCoMo Model, Detailed CoCoMo Model. You can decide to choose one of these three based on the requirement of your project: how accurate and detailed the estimation must be.
– Basic CoCoMo model. People come up with estimations through this model only based on project size (lines of code). Therefore, the basic model is the riskiest method to estimate a project.
– Intermediate CoCoMo model. When it comes to this model, estimators will collect data like cost drivers and the size of the project. And of course, the intermediate model will produce more accurate estimations for your project.
– Detailed CoCoMo model. Although the intermediate model of CoCoMo can resolve numerous issues compared to the basic one, there are still several limitations coming along like effort estimated inaccurately, and the need for cumbersome calculations when working with big projects. That’s where the detailed model will help you with. Detailed CoCoMo will apply various effort multipliers to each cost driver attribute. Meanwhile, the project is divided into smaller modules. After that, we will estimate the effort used to complete each module and sum them up.
– Types of cost driver used in intermediate and detailed models are Required Software Reliability, Database Size, Product Complexity, Execution Time Constraint, Main Storage Constraint, Virtual Machine Volatility, Computer Turnaround Time, Applications Experience, Programmer Capability, Virtual Machine Experience, Programming Language Experience, Modern Programming Practices, Use of Software Tools, Required Development Schedule.
Work breakdown structure (Combination-based estimation)
Work breakdown structure.
– What is it? According to Wikipedia, “A work-breakdown structure in project management and systems engineering, is a deliverable-oriented breakdown of a project into smaller components.” The component units in this method are deliverable, task and subtask. This tool helps you to estimate detailed costs and time needed for a project. Furthermore, the Work breakdown structure also gives you an outline for schedule development and control.
– Why WBS? When a team starts discussing the estimation, all stakeholders will review and calculate them and come to agreements and commitment altogether. Thus, all team members will understand and be more responsible for the project. Furthermore, your estimations in terms of cost and schedule are more accurate when using work breakdown structure method.
There are also some other methods to estimate your project:
– Application of Parkinson’s Law
– Estimation by complexity level of order
– Estimation by team
– Pricing to win
As a bonus, Designveloper wants to give you some tips to come up with more precise estimations:
– Businesses must provide all the existing ideas, requirements to the outsourcing company so that they will have a better picture of your plan. However, before sharing anything, you should make the outsourcing company sign a non-disclosure agreement, this way your idea won’t be stolen by others.
Businesses must provide all the existing ideas, requirements to the outsourcing company so that they will have a better picture of your plan. Image: Harvard.
– There should be a meeting between the two parties to discuss and define goals as well as commitments beforehand.
– Estimators have to understand the functional and nonfunctional requirements.
– Goal/requirement prioritization is important.
– All assumptions must be cleared
What is “rough estimation”?
Rough estimation is the very first level of every estimating process. It happens when the client sends out their requirements, most of the time, these requirements are vague and unclear. And then there comes the software development company. This company will use these inputs (ideas, timeframe, budget, etc.) to size and estimate the project.
As stated above, due to the lack of information, companies can only deliver approximate estimations. The accurate level would be from 25% to 75%. And obviously, the estimation will not include detailed insights and obstacles.
On the one hand, the reason for doing this is to help clients understand the scope, length and range of work. On the other hand, clients will base on this estimation to decide if this company’s vision matches with their requirements (budget, duration, and other resources).
You like a great estimating service? You want it? Just buy it!
Just like any other services, it’s hard to find an expert or a team of experts when it comes to project estimation. Sometimes, a free estimating service would hit you right in the eye. Well, sounds interesting, huh? But you must already know most of the time free equals to inaccurate and money-wasted.
Great things take time and effort, so does the estimation. If you and your team don’t have a good knowledge of technology, then here are some issues may come across the process such as:
– Hidden works. Though these issues come along with almost every project, an estimator who is lack of experience sometimes cannot point them out or can only discover some of it.
– Risky features. These requests seem easy but actually, it’s hard to complete with the current budget and timebox.
– Red flags. Red flags could be some unethical, impractical requirements or requests that users cannot understand and use. Features go out of technology trends or do not fit in a particular culture of an area may result in such issues too.
And that’s why an expert is highly recommended in this case, and we all know, experts do not work for free.
In short, estimation is one of the most important things to prepare for your future project. Doing this right, chances are that your product will be on the top, or else, it goes down to hell as a disaster. And if you are looking for an expert to size and estimate your plan, Designveloper is a perfect choice for you. Fill in this form to share your ideas and we will contact you as soon as we conduct the estimation. Cheers to the future successful!